
Google Authentication in REACT NATIVE Application

Introduction to Google Authentication
Modern mobile apps often require user authentication to provide personalized experiences and secure access to data. Authentication systems such as traditional username/password, Single Sign-On (SSO), and social logins serve this purpose. Among these, Google Authentication stands out due to its simplicity and familiarity.
This blog will guide you through setting up Google Authentication using Firebase in your React Native Application. You will learn how to integrate Firebase into your React Native project, set up Google Authentication, manage user sign-in and sign-out processes, and securely access user information. By following this guide, you will be able to add a strong and user-friendly authentication system to your React Native apps, using the security features of Firebase and Google Authentication.
Google Authentication, integrated through Firebase, offers a straightforward way to implement secure sign-in functionality into your React Native app. It leverages users’ existing Google accounts, streamlining the login process and enhancing user convenience and security.
Why Use Google Authentication?
- User-Friendly – Many users already have Google accounts.
- Secure – Google Authentication provides a secure way for users to log in.
- Easy Setup – Firebase makes it simple to integrate Google Authentication into your Mobile Application.
Importance of google sign in mobile apps –
1. Convenience – Users can log in without needing to remember a separate username and password, and it works seamlessly on both Apple and Android phones.
2. Easy Registration – Users can sign up quickly with their Google account, which can increase sign-up rates.
3. Security – Google Sign-In uses secure authentication methods to protect user accounts and data.
4. Trust – Users may feel more secure using your application when they see the option to sign in with Google.
5. User Data Access – With user consent, you can access their profile information, email address, and other shared data.
6. Single Sign-On (SSO) – Users can enjoy a seamless login experience across multiple applications that use Google Sign-In.
Steps to Set Up Google Authentication –
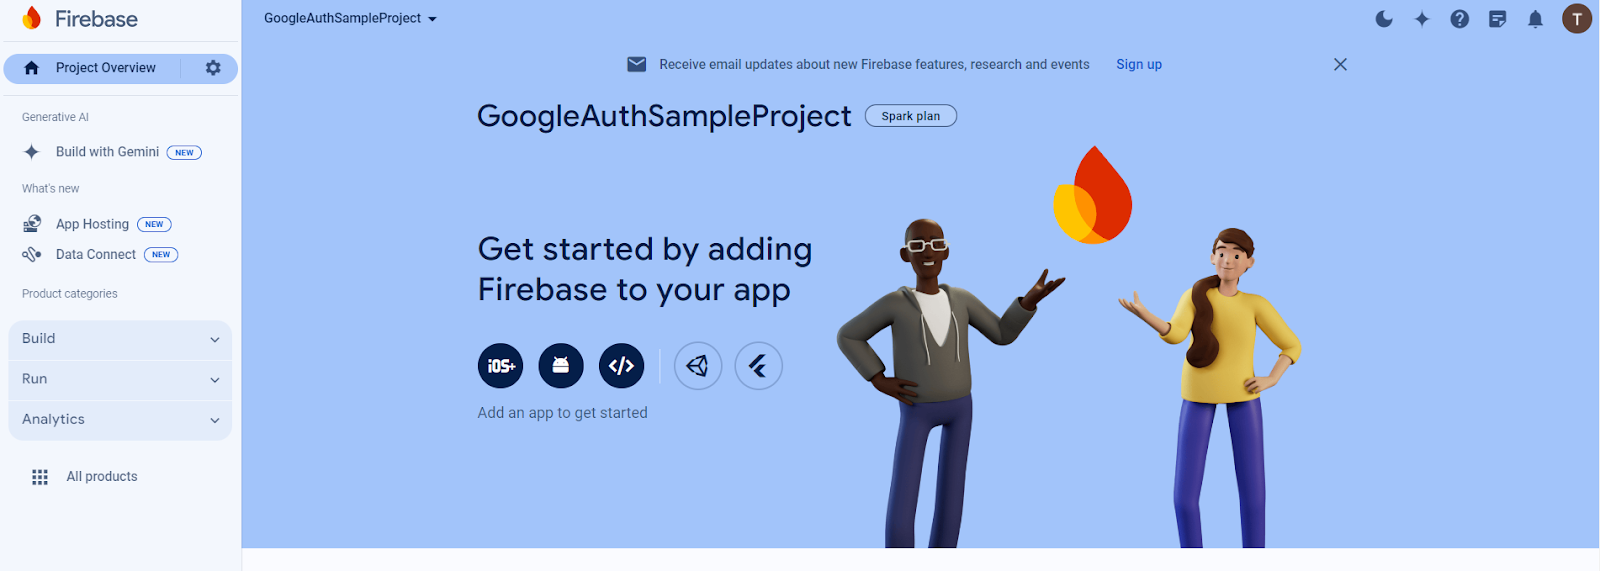
- Create a Firebase Project –
- Go to Firebase Console: Visit Firebase Console.
- Create a New Project: Click “Add project”.
- Enter your project name and click “Continue”
- Click on “Create project” to finish creating your Firebase project.


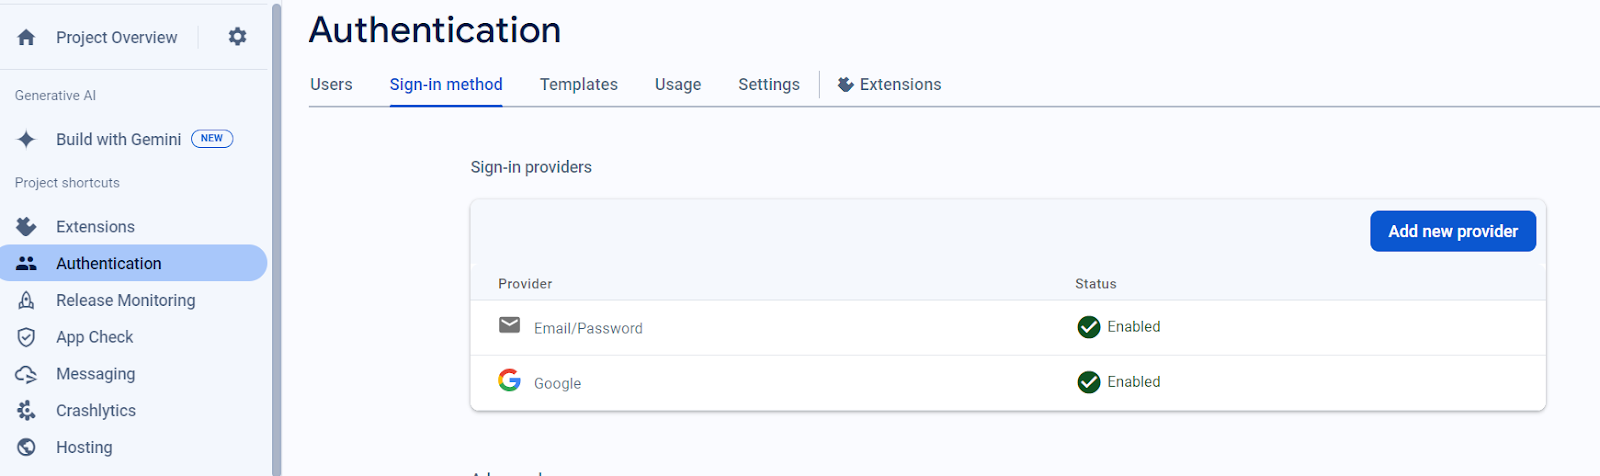
- Setup Firebase Authentication –
- In the Firebase Console, navigate to the “Authentication” tab from the left sidebar.
- Click on the “Get started” button to enable authentication.
- Choose the authentication methods you want to enable (e.g. Google, Password, etc.).
- Once enable click on google, you can see project name & supported email. Then open web SDK configuration & copy the web client ID. You need to add this in your project.
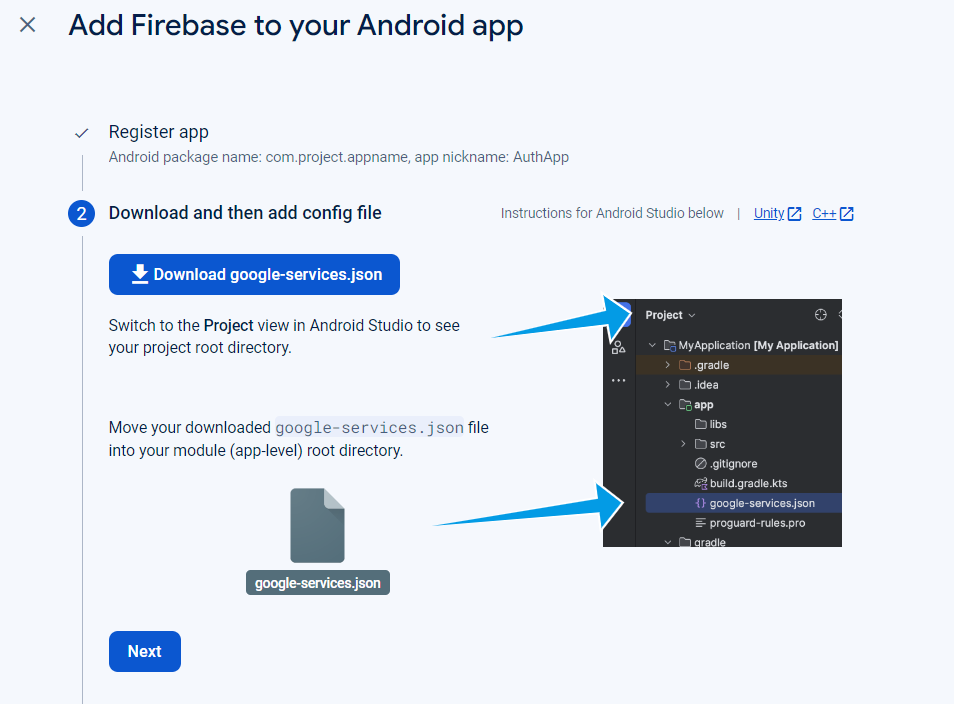
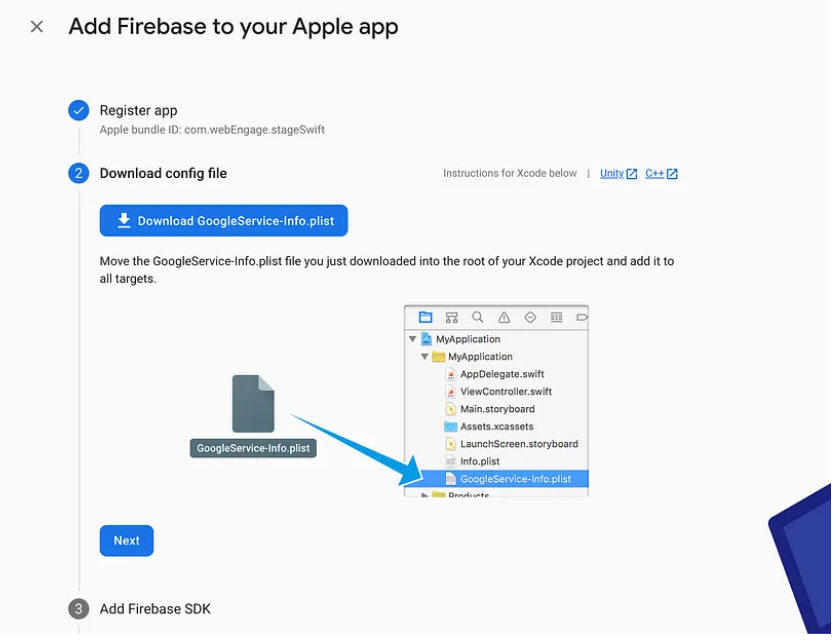
- Add Your App to Firebase (Android & iOS) –
- Register –
- In the Firebase Console, click on the “Android & iOS” icon to add an Android & iOS app.
- Enter your project package name. This is the application ID defined in your android/app/build.gradle file (usually in the form of com.yourproject.yourapp).
- You can add a nickname for your app and add SHA-1 fingerprint for enhanced security and authentication.
– using ./gradlew signingReport is a convenient way to generate the SHA-1 key in Android Studio.
I. If you’re not already in the Android directory of your React Native project, navigate there by running –
II. Execute the following command –
III. After running the command, you will see an output similar to this –
IV. Look for the SHA1: entry in the output for the debug or release variant, depending on which one you need. & add this SHA1: key to your project.
Download and then add config file –
1. Android
- Click on “Register app” and then download the google-services.json file.
- Move the google-services.json file to the android/app/ directory of your React Native project for android.
2. IOS
- Download the GoogleService-Info.plist file for iOS.
- Open your Xcode project.
- Drag and drop the GoogleService-info.plist file into your project’s root folder.
- Ensure that the file is added to your Xcode project’s target.
- Configuration –
- Android –
I. Install the below dependencies –
II. In android/build.gradle, add the following line in the dependencies section –
III. In android/app/build.gradle, add at the bottom –
IV. In android/app/src/main/AndroidManifest.xml, add –
Replace YOUR_WEB_CLIENT_ID with the Web client ID from the Firebase console.
- IOS –
I. In your ios/Podfile, add –
Run pod install from the ios directory.
II. Configure Firebase in AppDelegate.m In your AppDelegate.m file, add the following code to configure Firebase –
III. Update Your Podfile Open your project’s Podfile and make the following updates –
IV. Run Pod Install In your project’s root directory –
- Implement Authentication in React Native –
- Initialize Firebase and Google Sign-In –
- Create Sign-In Function –
- Call the Sign-In Function –
- Test the Implementation –
- Run your React Native app on an Android & iOS device.
- Click the “Continue with Google” button and follow the authentication flow.
- Check Firebase Authentication in the Firebase Console to see if the user is successfully authenticated.
By following these steps, you should have Google Authentication set up in your React Native app using Firebase.
Conclusion –
This blog covers integrating Google Authentication with Firebase in a React Native app, simplifying and securing the user login process. Learn how to efficiently set up authentication to enhance the user experience. Experiment with advanced Firebase Authentication features to further improve your app’s functionality and security.


